Price for 20092014 Ford F150 Factory Gps Navigation Upgrade Easy Plug Play Install
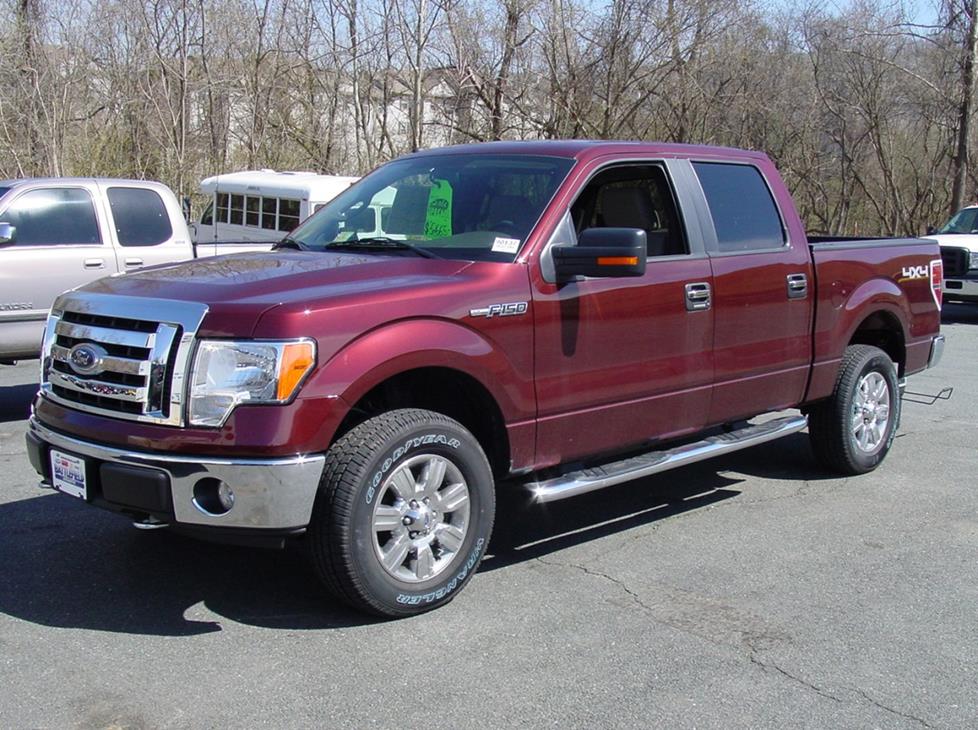
2009-2014 Ford F-150 SuperCrew
Upgrading the stereo organization in your F-150 SuperCrew
2009 • 2010 • 2011 • 2012 • 2013 • 2014
In brief: This Crutchfield Research Garage article gives you an overview of your F-150 SuperCrew's stock stereo system and your aftermarket upgrade options. Utilize our vehicle selector to notice the gear that will fit your truck.
Overview of the Ford F-150 SuperCrew
Even the most casual sports fan knows the tired old clichés that fill up every media outlet every time the previous yr'due south champs set to open a new flavour: No affair the sport, we're all helpfully reminded that last twelvemonth was last yr, staying number one is tough, and that the other teams are really going to get after them because being the champ is similar having a target on your back.
Is it tiresome, bland sports-speak? Of course it is. Alas, it's also true, which makes the Ford F-Series pickup'southward 3-decade-long (and counting) run at the top of the truck sales charts all the more amazing. Talk about your 3-peats.
Needless to say, with huge profits and prestige at stake, Ford had a lot riding on the 12th generation F-Series that debuted in 2009. The new line, led by the wildly popular F-150, didn't disappoint, with a tough new look, three useful trunk styles, an astonishing array of trim levels and options, and the rugged versatility that people – lots and lots of people – want from a pickup. Non surprisingly, the F-Series isn't only the most popular truck in the country; it's ane of the well-nigh popular vehicles of any kind.
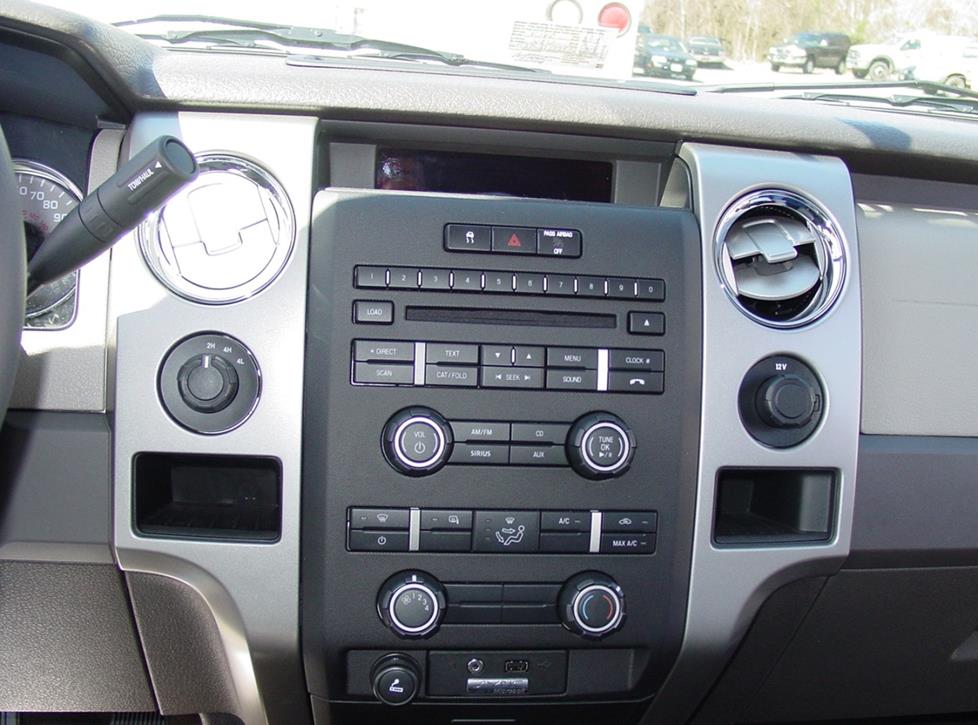
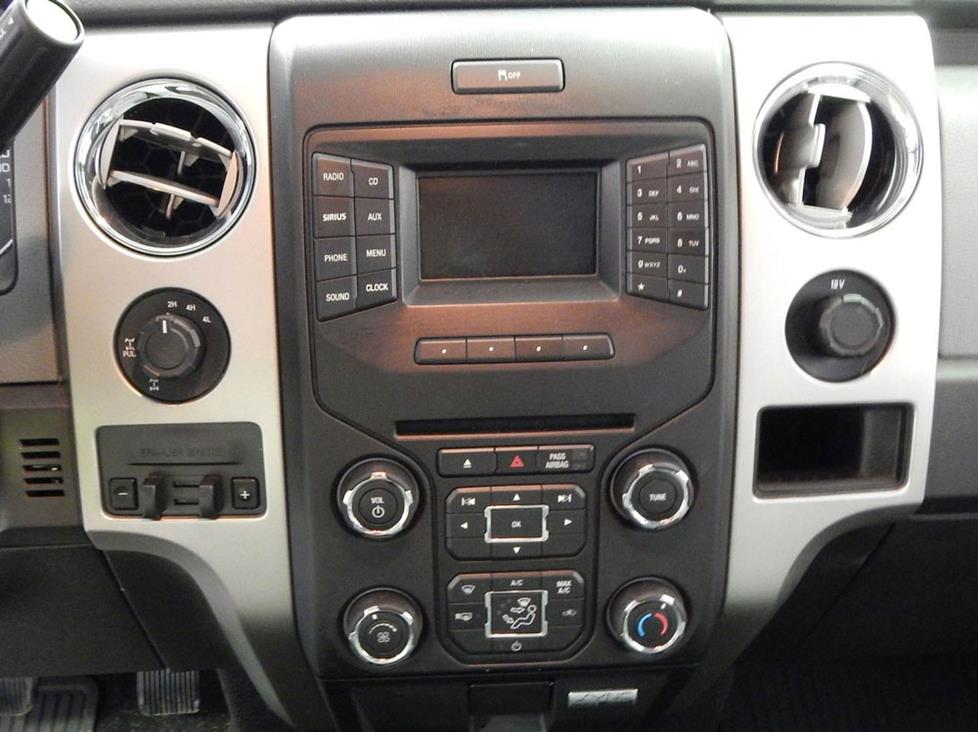
The SuperCrew's integrated radio (Crutchfield Research Photo)
Manufactory stereo organisation
The F-150 SuperCrew was available in a variety of unlike trim packages with a variety of different stereos. The base stereo was a simple AM/FM radio, and the step-ups went from a CD player with an aux jack all the manner to a Sony audio arrangement. Satellite radio was an pick as well, not to mention Ford's SYNC® organisation. No affair what'due south in the dash and doors, though, those manufacturing plant stereos aren't equally powerful and rugged every bit the truck that surrounds them. Thankfully, we know how to prepare that.
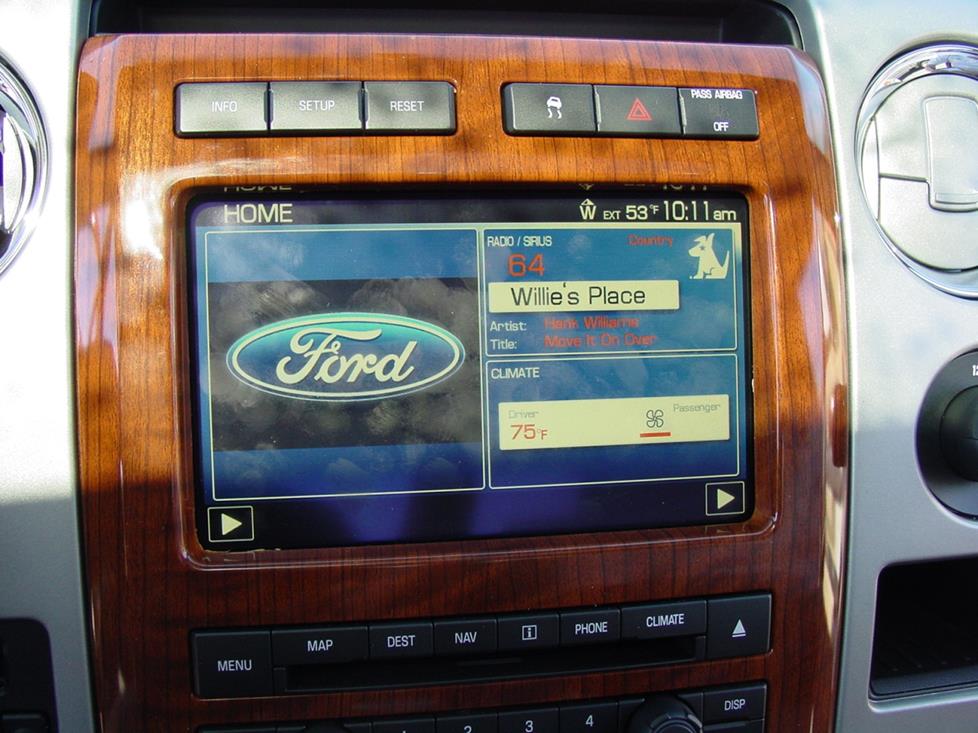
The optional nav receiver (Crutchfield Research Photograph)
Replacing your factory radio
Thanks to a mid-cycle dashboard revamp, there's a departure in how you approach radio replacement in 2009-2012 and 2013-2014 F-150s. What yous have to do depends on which truck you have, and Crutchfield MasterSheets are available for both the older and newer versions. Speaker replacement remains the same for all 12th-gen F-150s.
Detailed stereo and speaker removal instructions

With footstep-by-pace disassembly instructions and enough of up-close, detailed photos, our exclusive Crutchfield MasterSheet™ takes the guesswork out of removing the factory stereo and speakers. It'due south free with your Crutchfield club, or you lot can purchase one separately for just $9.99.
2009-2012 models
In basic terms, the F-150 has one of iii radios: integrated, not-integrated, or a navigation receiver. Details betwixt receivers vary, of grade, just for our purposes, the type means a lot more than the specs.
The integrated and non-integrated radios require a dash kit, which is included gratuitous with most Crutchfield stereo purchases. These kits, which work with single-DIN (2" tall) or double-DIN (iv" tall) aftermarket stereos, do a very squeamish job of integrating your new receiver into your existing dashboard.
If your truck is equipped with the meridian-of-the-line navigation radio, though, it'due south a wee bit more complicated. There is a dash kit that will allow you to install an iDatalink-set up double-DIN receiver in your truck, just you'll likewise need an iDatalink ADS-MRR or ADS-MRR2 module to brand everything work. You lot'll meet all this when you enter your vehicle info, and if you have questions, we're hither to assist.
Depending on which of the other radios you lot're replacing, you lot'll lose functions like the factory aux input connexion, satellite radio, or SYNC. Thankfully, the right combination of adapters and gear will let y'all become those features back, better than ever. Our Crutchfield Advisors can help you choose the correct bundle for your needs, and give yous the communication you lot need to do the job correct.
To go started on replacing your radio, open the lower nuance storage tray. Push out the SYNC console (Or, if you don't have SYNC, a blank plate.) from backside to release the retaining clips. Disconnect the harnesses and remove, and then remove the exposed 7mm screw. Pull upward the rubber mat in front of the dash brandish and remove two exposed 7mm screws. Then, advisedly pry out the inside edges of both radio side panels to release the retaining clips — but don't remove them.
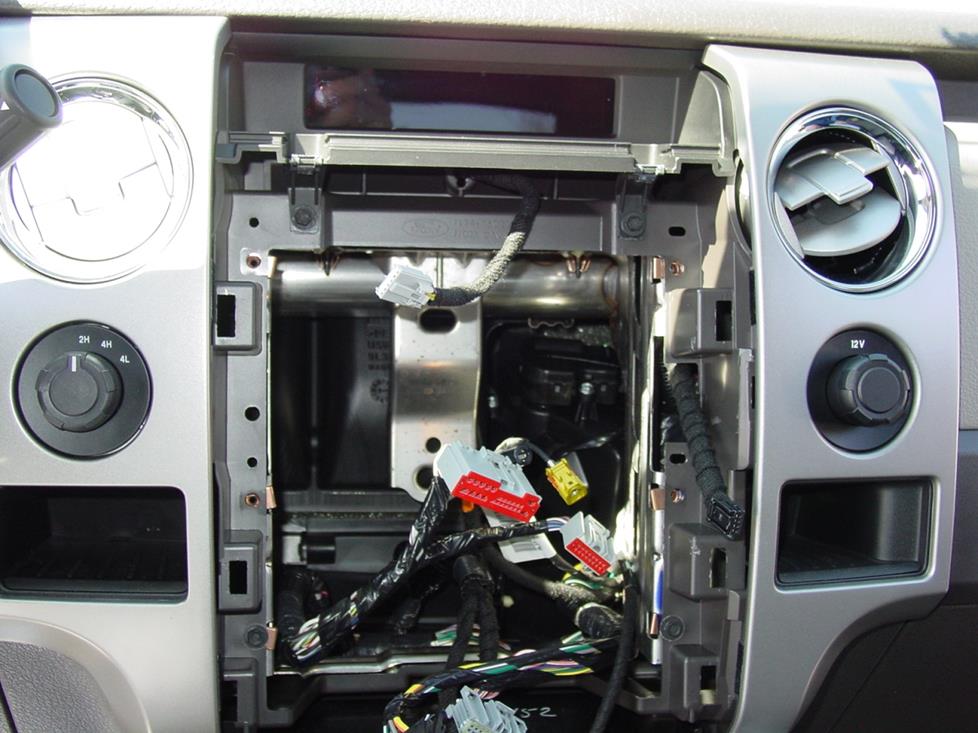
Here's a look into the F-150'south radio cavity (Crutchfield Research Photograph)
Pry out the receiver faceplate (integrated radios) or trim panel (non-integrated) to release the retaining clips, so disconnect the wiring harnesses and remove the faceplate or panel. What happens next depends on which mill receiver you have in your truck.
If you lot take an integrated radio, remove the screws securing the radio/chassis to the dash, and then disconnect wiring harnesses and antenna and remove the entire associates. If yous have the non-integrated radio, just remove the screws, then disconnect and remove the radio.
Complete, illustrated instructions can exist found in the Crutchfield MasterSheet that's included costless with your order. You'll too become a nice discount on the wiring adapter needed to connect the new receiver to your vehicle's wiring.
The dash design changed in 2013, and then did the radio removal process (Crutchfield Research Photograph)
2013-2014 models
To remove the base radio, follow the instructions for the 2009-2012 "integrated" radio. If you have the 4.2" LCD screen, refer to your MasterSheet for detailed, illustrated instructions. Removing the LCD radio isn't hard, but there are quite a few steps, then you'll want to stay calm and stay organized throughout.
In almost cases, you'll lose manufactory features like USB and AUX inputs, SiriusXM satellite radio, and navigation when you supervene upon the stock radio, but you can regain most or all of them past choosing the right aftermarket receiver. You can also retain SYNC functionality with the correct wiring harness adapter. Only enter your vehicle data and let our database discover exactly what y'all're looking for.
Tools needed: Console tool, Phillips screwdriver, 5.5mm/7mm/10mm sockets, ratchet, and extension
Steering bicycle audio controls
It's relatively like shooting fish in a barrel to retain your truck's steering wheel sound controls when you install a new stereo. When y'all enter your vehicle information, our database volition choose the adapter you need to make your factory steering wheel controls piece of work with your new receiver.
Tools needed: Console tool, socket wrench, extension, and 7mm socket
Shop for car stereos that fit your Ford F 150 FX2

The F-150's big front door has room for some big speakers (Crutchfield Enquiry Photo)
Replacing your factory speakers
The F-150 SuperCrew is a relatively elementary truck, and replacing the front door speakers is a relatively elementary process. How much so depends on your DIY skills, of grade, just if you're reasonably handy with tools, it really isn't that bad. Another factor is whether your truck has power windows or proficient sometime-fashioned crank windows. Either way, you lot'll need to remove the door panels. The important thing is to work slowly and carefully to avoid breaking or damaging the plastic bits.
The manufacturing plant half dozen"x8" speakers tin can be replaced by aforementioned-size or 5-1/4" models. If you get with the smaller speakers, you'll need an adapter bracket, which you can become at a prissy discount when you buy your speakers from Crutchfield.
Tools needed (power windows): Panel tool, socket wrench, extension, five.5mm, 7mm, 8mm & 1/4" sockets
Tools needed (transmission windows): Panel tool, socket wrench, extension, 5.5mm, 8mm, & 1/iv" sockets, Torx T-20 driver
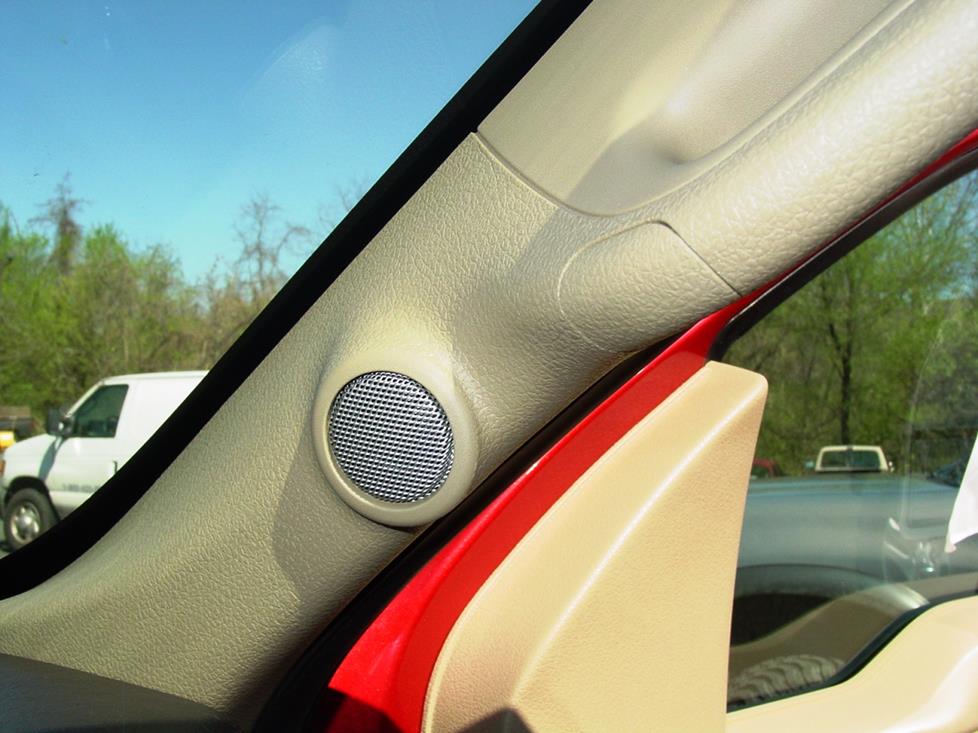
The tweeters are located in the front pillars (Crutchfield Research Photo)
Front colonnade tweeters
Trucks equipped with the mill Sony audio system include a few more speakers than the average F-150, including a pair of 4-ohm tweeters located in the front pillars. Replacing them isn't hard, merely in that location are some things you'll want to know before you start.
For one matter, there's a scrap of a difference in how yous remove the driver'due south side and rider's side tweeters. It's nothing major – on the driver'due south side, y'all pull downward the door gasket and pry out the plastic trim; while on the other side, you have to remove the colonnade pull handles before you can get to the door gasket – but it's good to know. Consummate instructions can be found in your Crutchfield MasterSheet.
To mount the new tweeters, you'll either need to make your own mounting bracket, or use 1 of our universal backstraps. A wiring harness is non bachelor for this location, and then y'all'll want to make the connections using a set of Posi-Products connectors. This is a lot easier than splicing, plus you'll get a much stronger connection – a good thing, considering how often you lot open up and close the front doors.
Tools needed: Panel tool, Phillips screwdriver, socket wrench, and 7mm extension (passenger'southward side only)
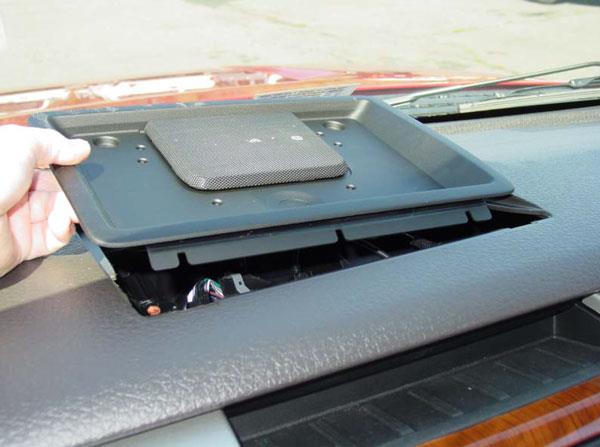
The nuance speaker is easy to get to and piece of cake to remove (Crutchfield Research Photo)
Middle-channel dash speaker
Sony-equipped trucks also have a three-1/2" speaker in the middle of the dash. Information technology's easy to get to and easy to supplant, but y'all'll want to employ some other set up of Posi-Products connectors to create a strong, long-lasting hookup.
You'll as well need to cut off ii plastic location pins from the manufacturing plant speaker bracket before y'all mountain your new speaker. This modification does not impact the bracket'southward structural integrity.
Tools needed: Panel tool, socket wrench, five.5mm and 7mm extensions, small flat blade screwdriver

The rear door speakers are identical to the ones in the front end door (Crutchfield Research Photo)
Rear door speakers
The SuperCrew's spacious rear seating expanse turns this truck into a comfy chariot for your coworkers or family. And even when it'due south empty, those big doors have plenty of room for amend speakers.
As with the front doors, the mill 6"x8" speakers tin can be replaced by same-size or five-one/4" models. If you go with the smaller speakers, you'll need an adapter subclass here, too.
Removing and replacing the speakers is really not that hard, but there are a lot of steps and you'll exist getting good use out of your socket wrench gear up.
Considering yous'll be dealing with three different screw sizes, information technology's a good idea to make sure you lot have some cups or bowls handy to keep them (and the extension bits) organized. It'south also important to piece of work slowly and carefully when you're removing the various plastic $.25 and panels.
The complete, illustrated instructions in your Crutchfield MasterSheet will guide yous through every pace of the process, and our Tech Support squad is only a phone call abroad – even on weekends.
Tools needed: Console tool, socket wrench, extension, 5.5mm, 6mm, 8mm, and 1/iv" sockets
Shop for speakers that fit your Ford F 150 FX2
Bass in your F-150 SuperCab
The manufactory viii" subwoofer, as well a role of the Sony system, is located nether the right rear seat. This down-firing, dual vocalization whorl sub is quite easy to remove and replace, and a wiring harness is not needed. The manufactory amplifier won't take enough ability for an aftermarket subwoofer, so if you replace this sub, you lot should also install a new amp.
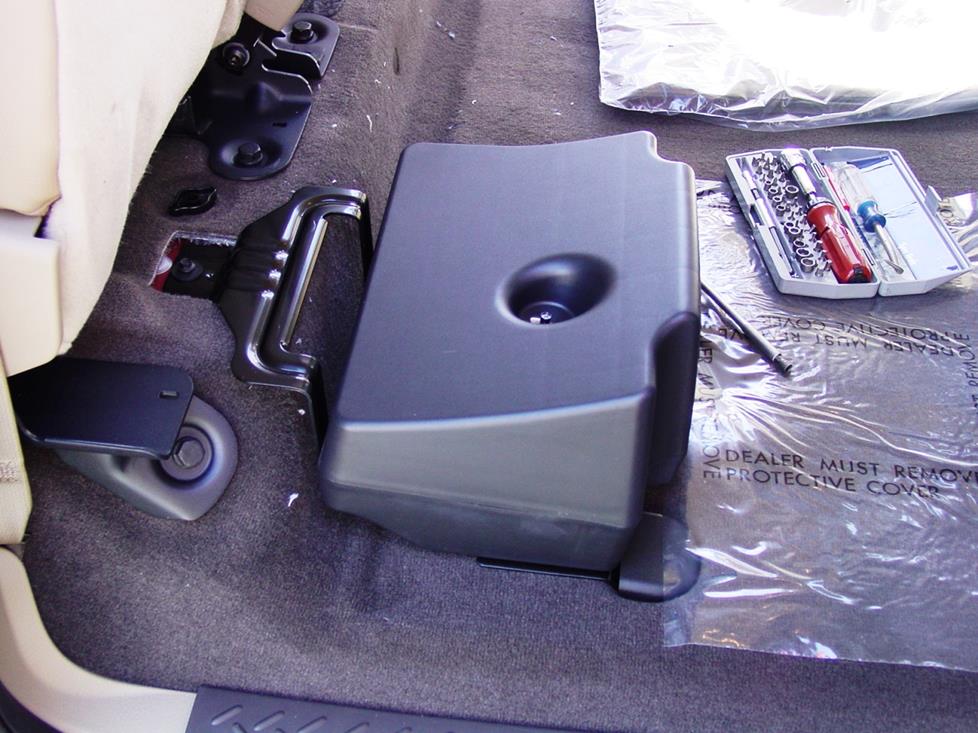
The factory sub is located under the right rear seat (Crutchfield Research Photo)
To get started, lift upwards the seat; then remove the 8mm screw that secures the rear enclosure bracket to the floor. Pry off both front enclosure bracket covers and remove one 8mm screw under each one. Remove ane 8mm screw on the back of the enclosure; then remove eight Phillips screws that secure the subwoofer to the enclosure.
Once that'southward washed, disconnect the harnesses and remove the sub. You'll demand to use self-tapping screws when you lot install your new aftermarket subwoofer. Y'all'll demand a Phillips screwdriver, a socket wrench, an extension and an 8mm socket for this chore.
If you're thinking about going large and installing a custom sub box underneath the rear seats, you have a 52" West 10 6" H x eleven" D infinite to work with in the SuperCrew. Of form, the easier choice is to install a custom-designed sub package from Kicker or MTX Audio. These sub enclosures are fabricated to fit your F-150 perfectly, and some tin exist ordered in colors that lucifer your truck's interior. To run across what's available to fit your F-150, go to our Outfit My Auto page and enter your vehicle information.
Shop for vehicle-specific subwoofers for your Ford F 150 FX2
Other options for your F-150 SuperCab
As you might look with a truck as pop every bit the F-150, there are lots of means to upgrade your entertainment and security.
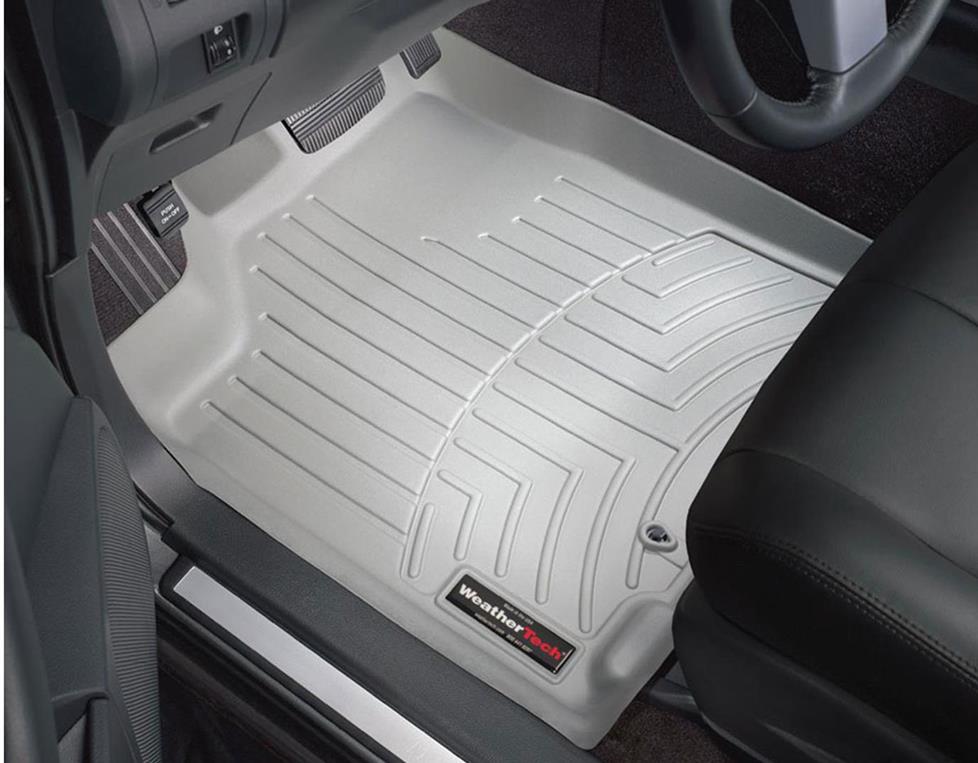
WeatherTech DigitalFit® FloorLiners™
Floor mats
No matter how much you pamper your truck, you're eventually going to get involved in some sort of truck-similar action that gets you and/or it dirty. When that happens, it'southward a good thought to have a fix of WeatherTech Floor Mats in your truck. These incredibly durable mats trap moisture, contain clay, and continue your factory carpets looking good.
Sound damping
Your F-150 is a big vehicle with big doors and the aerodynamic profile of, well, forget the cute analogies, a truck. To foreclose wind noise and road roar from undoing the great work your new stereo is doing for y'all, make sure you install Dynamat when you're replacing your speakers. This soundproofing textile is a great way to dampen the sounds you don't like and get more enjoyment out of the ones y'all do. For more than information on installing Dynamat in a pickup, bank check out our informative series of articles on our 2004 F-150 project truck.
Remote start and security systems
Adding remote start capability to your vehicle lets you warm it up in the winter or absurd it down in the summertime. The iDatastart organization is incredibly convenient and makes it easier than ever to install a remote outset system, so we highly recommend it. The module requires a vehicle-specific T-harness (sold separately) to connect with your vehicle's estimator, security, and ignition systems, so nosotros ask that you call to lodge so that we can make certain yous get the right harness for your ride.
Y'all can besides talk to your Crutchfield Advisor most a security arrangement. They're non as piece of cake to install (nosotros unremarkably advise letting a professional do the job), only we can help y'all cull a system that'll work in your vehicle.
Shop for car security systems for your Ford F 150 FX2
Discover the sound gear that fits your car or truck
Visit our Outfit My Car page and enter your vehicle data to see stereos, speakers, subs, and other sound accessories that will work in your vehicle.
Source: https://www.crutchfield.com/ISEO-rgbtcspd/learn/2009-2012-ford-f-150-supercrew-cab.html